Nesquick Container Makeover Part 3: Scrapbook Tutorial

      Comments Off on Nesquick Container Makeover Part 3: Scrapbook Tutorial

This scrapbook is a little tricky to fold, but if you follow the photos below, you shouldn’t have any problems.  It fits perfectly inside the Nesquik memory box, right alongside the mini notebook.

Supplies:

8-1/2″ x 11″ piece of cardstock

paper cutter with scoring blade

additional paper and embellishments for decorating

To Fold:

1)  Fold the paper in half along the 5-1/2″ score line.  You will end up with this:

2)  Now fold the paper along the 4-1/4″ score line.  You will end up with this:

Below are photos of suggested ideas on how to decorate the book.

_________________________________

After you add your photos, you can tuck your book away in your memory box. 

Nesquick Container Makeover Part 2: Mini Notebook

      Comments Off on Nesquick Container Makeover Part 2: Mini Notebook

Now that you have your Nesquik container memory box, why not add a little journal to put inside so you can jot down little notes to yourself?

You can make this coordinating journal by using a miniature composition notebook.  The book measures 4-1/2″ x 3-1/4″ and is the perfect size to hold a small pencil on the side. 

TUTORIAL:

1)  Cut two pieces of decorative paper 4-1/2″ x 3-1/4″ and round the corners.  Adhere one piece to the front of the notebook and the other piece to the back of the notebook.

2)  Cut one contrasting piece of decorative paper 4-1/2″ x 2-1/2″.  Adhere to the front, side, and back of the notebook.

3)  For the pencil holder, cut a piece of decorative cardstock 3/4″ x 3″.  Make a loop and adhere to the back cover of the notebook.

4)  For the bookmark, cut a piece of ribbon approx. 8″ long.  Tie one end to a decorative paper clip.  Add an embellishment to the other end. 

Nesquick Container Makeover Part 1

      Comments Off on Nesquick Container Makeover Part 1

I just couldn’t bring myself to throw away this cute Nesquik container.  When my daughter saw it sitting on the counter, she asked, “Are you going to cover that with paper?”  My girls know me so well.

First, remove the Nesquik label.  (It’s easy to do.  It just comes right off…no sticky mess like some labels.)  To cover, just use Mod Podge to make sure the paper adheres to the plastic, then decorate ’til your heart’s content!  I am going to make a bunch of these for the teenage girls at my church.  It would be fun to make a matching scrapbook, too, don’t you think?

Falling Leaves Waterfall Card: Tutorial

      Comments Off on Falling Leaves Waterfall Card: Tutorial


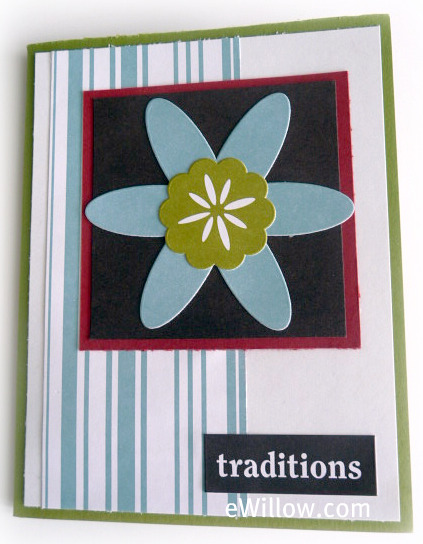
(I’ve listed the colors as a reference point…you can use whatever colors you want to use!)

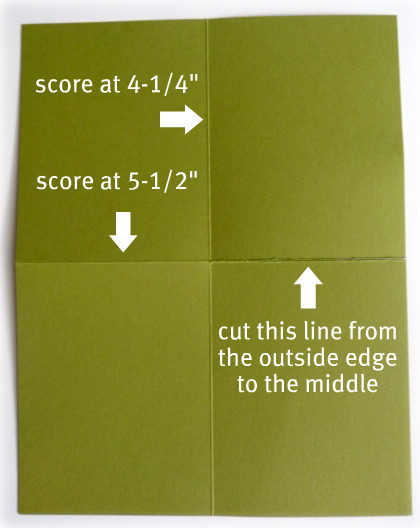
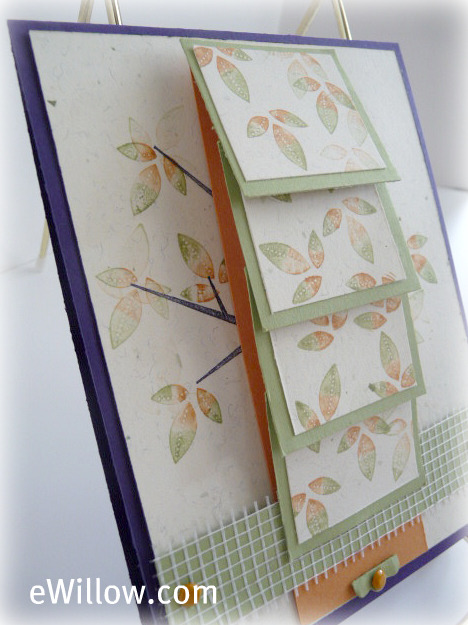
1)  For the card:  Cut a 4-1/4″ x 11″ piece of cardstock and score it down the middle at 5-1/2″ (purple)

2)  For the tree:  Cut a piece of cardstock 4″ x  5-1/4″ (ivory) and stamp the tree (purple)

For the leaves on the tree:   To achieve the multi-colored leaves, use a marker to color in one half of each leaf, and a different color marker to color in the other half of each leaf.  Randomly stamp the leaves onto the tree branches.

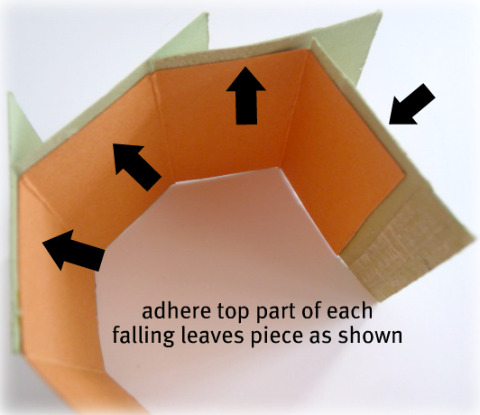
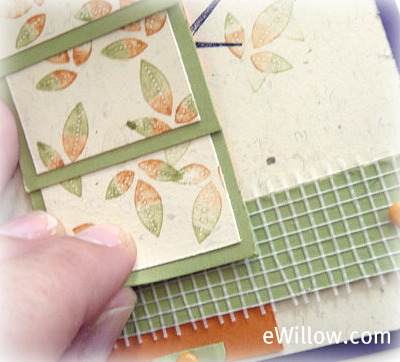
3)  For the falling leaves: Cut 4 pieces of cardstock 1-1/2″ x 1-1/4″ (ivory) and cut 4 pieces of cardstock 1-3/4″ x 1-1/2″ (green)  Repeat the process of coloring in the leaves with different colors of markers as described in step two above.  Stamp several leaves onto the four small pieces of ivory cardstock.  Layer the ivory cardstock onto the green cardstock.

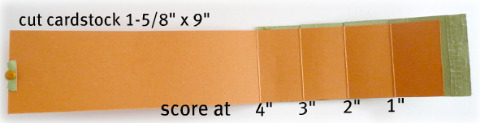
4)  For the pull tab:  For the pull tab, cut one piece of cardstock 1-5/8″ x 9″ and score this piece at 1″, 2″, 3″, and 4″ (orange)

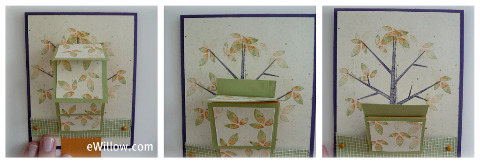
 Follow the photo below to see how to adhere the falling leaves pieces onto the pull tab.

5)  For the fence:  Cut one piece of cardstock 3/4″ x 4″ and cover it with a piece of drywall tape (green)  Attach with a brad on each side, but do not put any adhesive on it, like this:

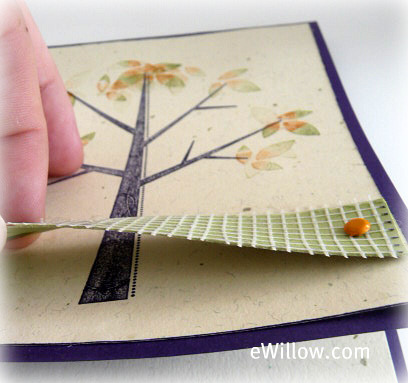
6)  To attach the pull tab to the card:  First, add a cute little embellishment to the un-scored end.  Next, all you have to do is slide the pull tab underneath the fence.  DO NOT put any adhesive on the pull tab.

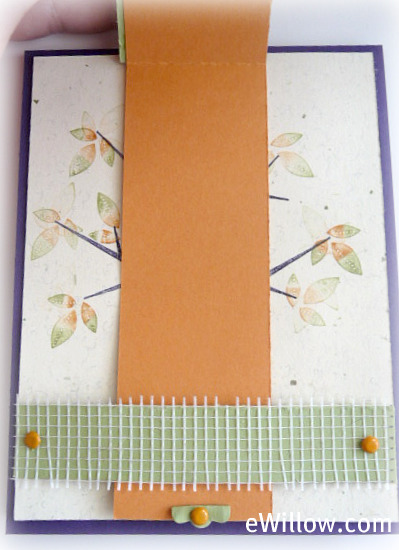
Finally, adhere the first falling leaves piece to the top part of the fence, as shown below.

Whew!  You’re done!  Remember, just gently pull on the tab and it will look like the leaves are falling off the tree.  Did you have fun?