To move or not to move has been our question for a long time now. Boy, I could really use a separate room for all things eWillow.com related. We are minus one bird now that Adrienne is off to college; however, I just can’t bring myself to turn her nest into a craft room. Where will she chill when she comes home?
I love where I work now because even though it is out-of-the-way, it is still part of where my family chills. I’m in a different room, but we have an open floor plan as far as the living and family rooms go, so we always feel like we are together. (I have this weird hang-up about being in a different room when my husband and kids are home with me. I like it when we are all together. It is some type of innate motherly feeling or something. Some people tell me I’m weird. Oh, well!)
I digress…
Back to the reason why we are here. My work room is very CLUTTERED. That is just how I roll when I’m making stuff. The clutter has caused me such anxiety that I am ashamed to have company! Funny thing is, you really don’t see the clutter unless you are standing in a certain place in our house. A few years ago, I tried to hide the clutter by doing this:
It worked really well for awhile. However, this photo was taken back at the beginning of 2008, which was nearly a year before the idea for eWillow.com was even conceived. Oh, how the clutter has grown since then!
A few weeks ago, we made our first-ever trip to IKEA. I was totally inspired when I saw a set of curtains. My mind immediately conjured up the idea to hang curtains from the ceiling and make my office a separate room that can be hidden when needed, but open when I’m working. And that is how we saved $750,000 on a new house by spending $100 at IKEA and Home Depot.
Let’s take a look:
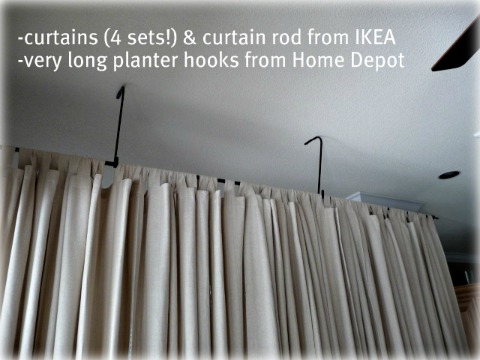
Our first challenge was making the curtains long enough. We have ten-foot ceilings, and I wanted the curtains to dust the floor, but I didn’t want them to hang directly from the high ceiling. Solution: long planter hooks from Home Depot. (I think they are 15″ long.) By laying the curtain rod onto the planter hooks, the curtains now almost touch the floor and they hang far enough down from the ceiling that I don’t feel claustrophobic. These picture makes me smile because this is the first big project that my husband was able to tackle after his cancer/chemo complications.