Mix Glitter with Crystal Effects for a Beautiful Bling

      Comments Off on Mix Glitter with Crystal Effects for a Beautiful Bling

I made about 80 of these cards to swap this weekend at the Stampin’ Up regional meeting in Orlando.  To add the glitter to the center of the flowers, I mixed fine cosmo glitter and crystal effects and dabbed the potion on with a paintbrush.

I can’t wait to swap!  I’ll be coming home with lots of projects to share with you.  Will you be there? 

Spring Break Project for Kids #2: Games in a Box

      Comments Off on Spring Break Project for Kids #2: Games in a Box

For this project, I recycled an empty plastic Sizzix die case.  You can use any type of similar box.  Just measure decorative paper to fit the outside and use Mod Podge to adhere the paper to the case.

You can also cover a mini notebook with decorative paper.  Adhere it to the top of the case with Mod Podge.  It makes a great score pad.

Fill the box with lots of fun stuff.

Make a tic-tac-toe board on the inside lid of the box.  All you have to do is adhere four thin strips of cardstock.


To make the x’s and the o’s, I stamped the letters onto cardstock, punched them out with a circle punch, and adhered them to the bottom of clear glass beads.


I also included a pair of dice and a pencil to keep score.

You can find puzzle cards at any craft store.  Stamp the images with permanent ink.  After you color in the images, be sure to spray a thin coat of sealer on the card.

You and your kids will have tons of fun making this and even more fun playing with what is inside.  Have a fabulous spring break!

Spring Break Project for Kids: Project #1 ~ Friend Tin Box

      Comments Off on Spring Break Project for Kids: Project #1 ~ Friend Tin Box

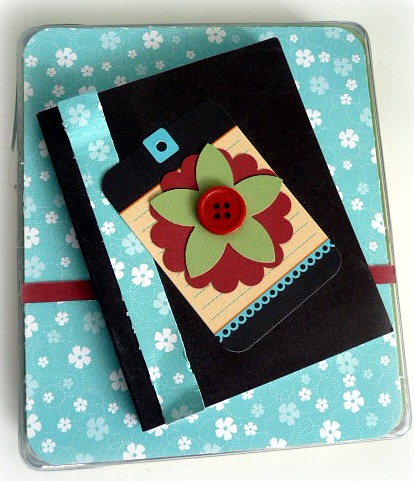
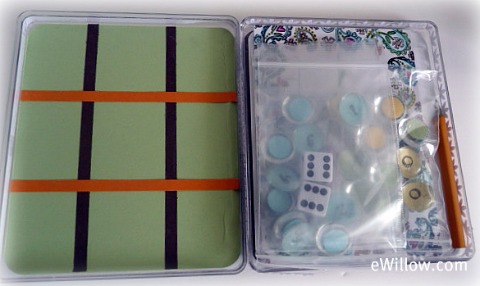
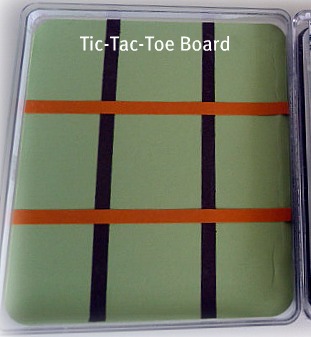
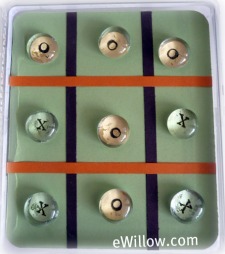
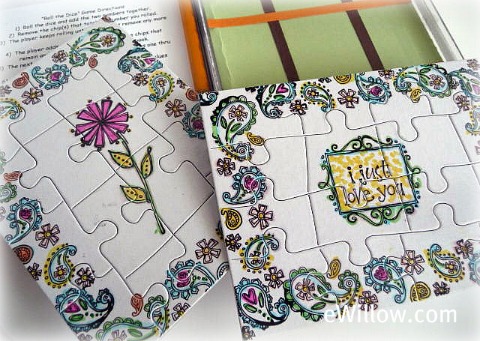
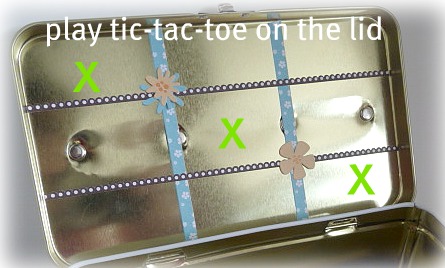
Here is our second Kids’ Spring Break Project.  This is fun because it makes use of the inside of the lid, too.  Let’s take a look…

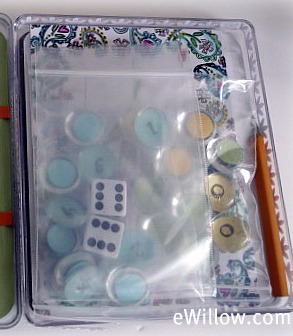
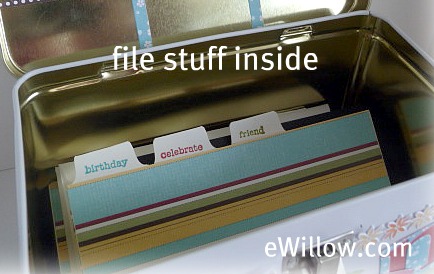
Here is a look at the inside…

To make this little gem, I first want to introduce you to a fabulous product!  Have you ever heard of/used Stampin’ Up!’s “Simply Scrappin’ Kits?”  If you haven’t, you must check them out NOW!  You can see them and order them HERE (click on the “Order Now” button, and then search for “Simply Stampin’ Kits.)

These kits have so many great features.  There are a variety of themes to fit most occasions.  Each kit contains:

*8 sheets of 12″ x 12″ textured card stock

*6 sheets of 12″ x 12″ patterned paper

*6 sheets of 6″ x 12″ self-adhesive die-cuts (2 each of 3 designs)

*the contents of the kit can be trimmed to create 6″ x 6″ or 8-1/2″ x 11″ pages

*$19.95 (USA) plus shipping/handling

******

My favorite part about the Simply Scrappin’ Kits is that the contents seem to multiply.  I never seem to run out.  You can make so many projects from one kit.

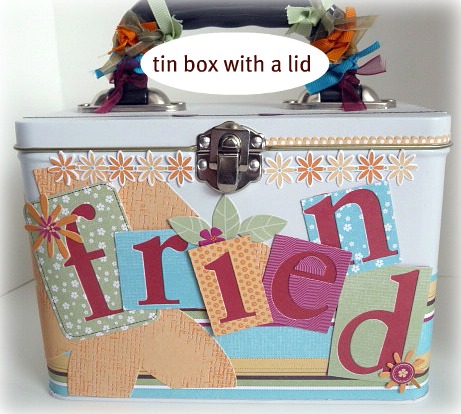
To make the tin, all you have to do is use the self-adhesive die-cuts from the Simply Scrappin’ Kit.  Just cut the pieces to fit your tin, apply, and you’re done!

For the inside, you can make or use pre-made mini file dividers.

Yes, it is really THAT easy!

Sneak-Peek: Spring Break Projects for Kids

      Comments Off on Sneak-Peek: Spring Break Projects for Kids

Spring Break is right around the corner! Yeah! Here is a sneak-peek at some of the projects I will be showing you how to make with your kids. 

1)  Game box with score pad.  (Just wait until you see what is inside!)

2)  Supply box with games and dividers.

3)  Tin box with mini scrapbook.

While you’re out-and-about this weekend, start looking for these supplies so you will be ready to go!  (You can also order supplies HERE.  Plus, you’ll get free stuff for every $50 of supplies you order.  Fun!)

**  plastic containers, tin boxes with lids

**  dice

**  mini notebooks

**  golf pencils

**  mini clear beads (the kind you put in glass jars for decoration) that have flat bottoms

**  decorative paper, embellishments, ribbon

**  sticky-back magnets (thin, not too thick)

**  puzzle cards