Countdown to Christmas Calendar: Part 5 of 5 (Hang it Up)

      Comments Off on Countdown to Christmas Calendar: Part 5 of 5 (Hang it Up)

Now that you’ve finished assembling the boxes and frames, it’s time to tie up all the loose ends and connect the frames together to create the wall-hanging.

I used twine, but you can use whatever you want.  Just make sure you cut the pieces the same size so that the calendar hangs evenly.

For a review of the tutorials:

For the box template, click HERE

For the box tutorial, click HERE

For the frame tutorial, click HERE

To order supplies, click HERE

For questions, send an email to [email protected]

Countdown to Christmas Calendar: Part 4 of 5 (Make the Frames)

      Comments Off on Countdown to Christmas Calendar: Part 4 of 5 (Make the Frames)

Click HERE for Part I

Click HERE for Part II

Click HERE for Part III

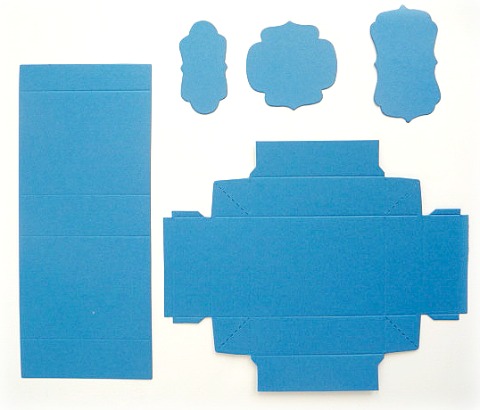
Click HERE for the matchbox template

Click HERE to order supplies

Send an email to [email protected] to order pre-made boxes

_____________________________

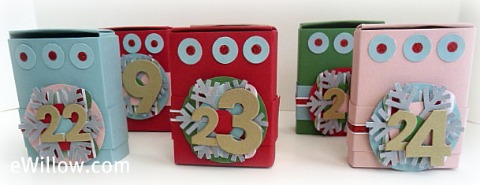
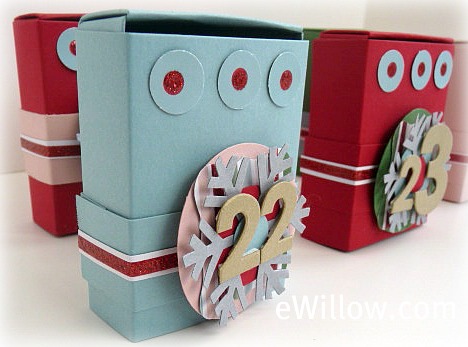
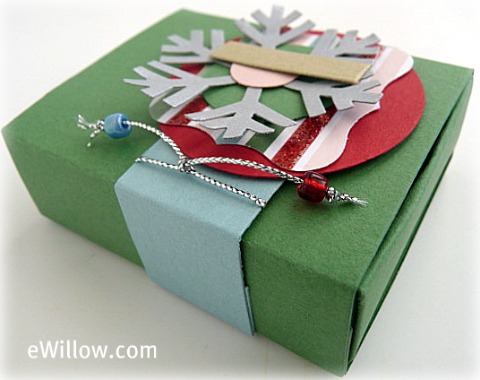
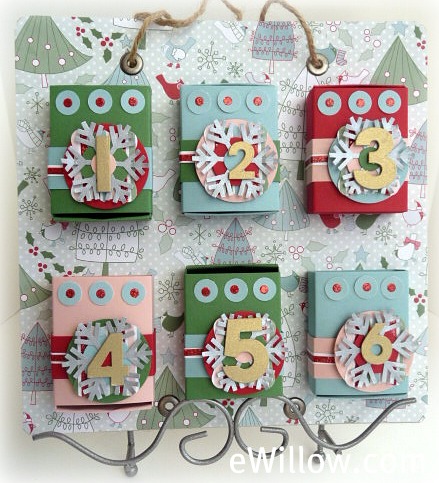
Now that your boxes are finished, it’s time to display them.  There are several different options, depending on how much space you have. 

If your space is limited, you can pile all of the boxes neatly into a pretty Christmas basket and choose a box each day:

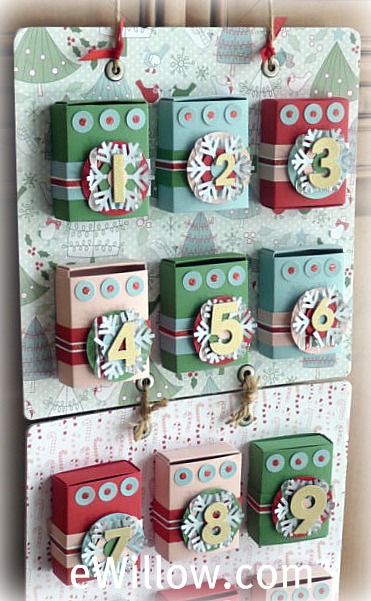
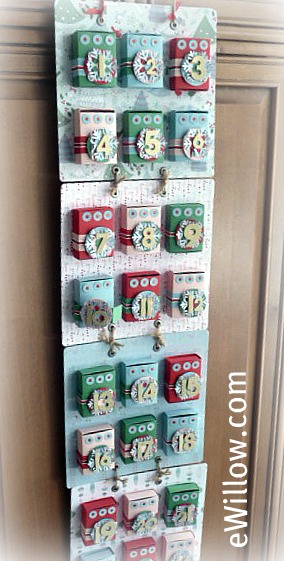
Today I am going to show you how to mount your boxes onto “frames.”  If you don’t have enough wall space to hang the finished frames, you can stand each frame on a plate stand and display them on a shelf:
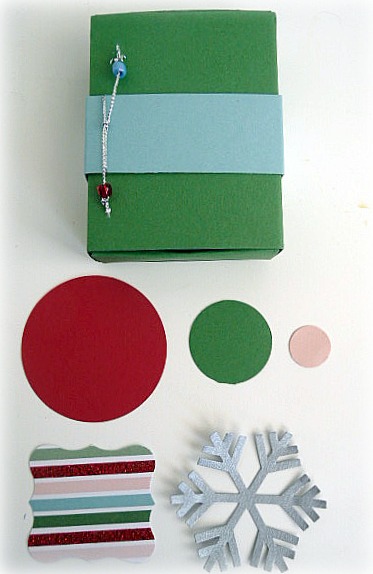
____________________________________

SUPPLIES:

Mod Podge

Candy Cane Christmas Specialty Designer Series Paper (#120809)

3/16″ corner rounder (#119871)

Crop-a-Dial (#108362)

Pewter Jumbo Eyelets (#108432)

4 pieces of 9-1/2″ x 9-1/2″ (or similar) chipboard, heavy-duty cardboard, or artist’s canvases
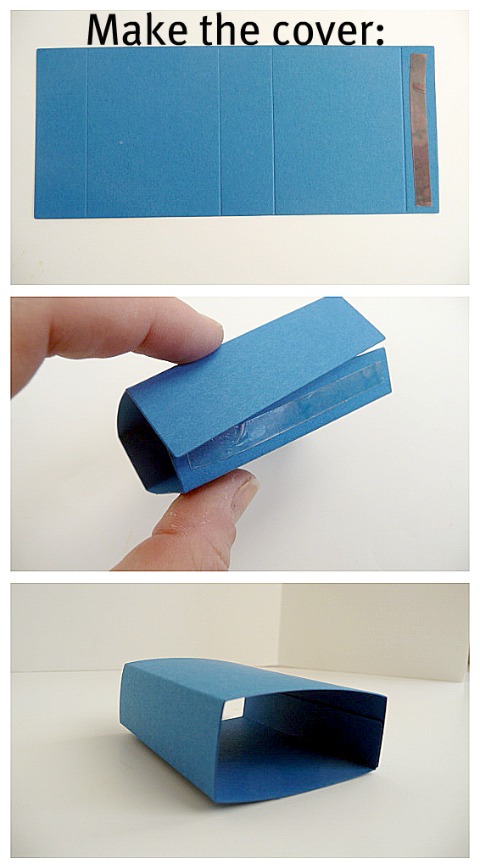
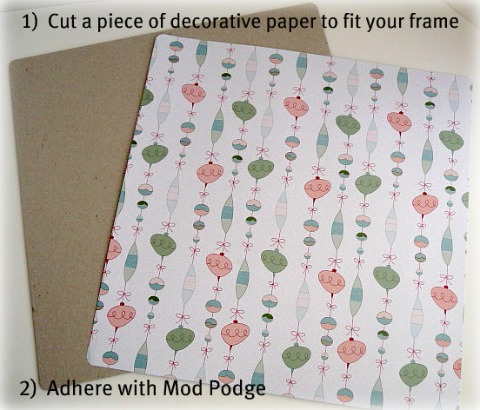
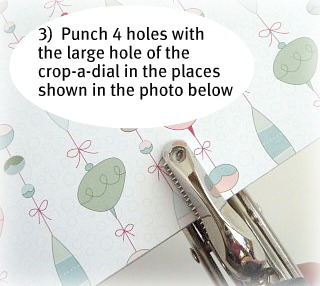
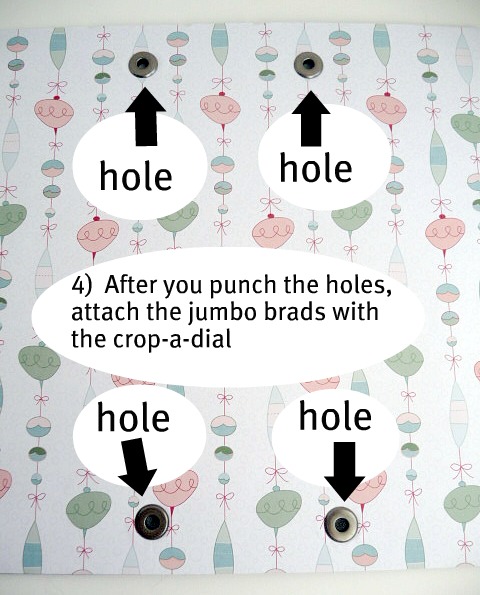
Steps 1 and 2: 

Cut a piece of decorative paper to fit your frame and adhere paper to frame with Mod Podge

Finally, attach the boxes to the frame with Mod Podge.  Be sure there is enough space between the rows so there is enough room to slide open the boxes.

Tomorrow we’ll turn the individual frames into one wall hanging.  See you then!

Countdown to Christmas Calendar: Part 3 of 5 (Box Template)

      Comments Off on Countdown to Christmas Calendar: Part 3 of 5 (Box Template)

Click HERE for Part I

Click HERE for Part II

Click HERE for the box template

Click HERE to order supplies

Email [email protected] to order pre-made boxes

_________________________

Before we move on to the calendar frames tomorrow, take a look at the finished boxes for decorating ideas.  I used the 3/16″ circle punch to punch out the glittery red polka dots from the 12″ x 12″ polka dot paper in the Candy Cane Christmas paper pack.  I also cut out the glittery red stripes from the striped paper and added the strips to the belly-bands.  I like bling.


Be sure to use Stampin’ Dimensionals (Item #104430) to make your numbers pop.  I used dimensionals under the 1-3/4″ circle, the 1″ circle, and the numbers.  I used Mod Podge to adhere the other pieces.  This is a project that will stay in the family for years to come, so I wanted to make sure I used adhesive that would last.

Remember to come back tomorrow for the calendar frame.  See you then!

here we go

      Comments Off on here we go

Adrienne had her first college interview yesterday.  How fitting that while she was at her interview, the rest of us were home tuned in to watch our daily dose of Gilmore Girls.  Is it a coincidence that yesterday’s episode was the one when Rory has her Harvard interview?  You know, the episode when Rory freaks out because she thought she was sooo cool because she was going to write her college essay about Hillary Clinton?  Needless to say, we freaked.  Erica freaked out the most because she said she was thinking about that episode all day in anticipation of Adrienne’s interview.  (That’s how we roll here at Harreveld-ville…we are always pointing out times when life imitates art.)

Next interview….Thursday.

And the hits just keep on coming!

(…quick!  What movie is that line from?)

Countdown to Christmas Calendar: Part 2 of 5 (The Boxes)

      Comments Off on Countdown to Christmas Calendar: Part 2 of 5 (The Boxes)

(For Part I, click HERE)

SUPPLIES FOR ASSEMBLING THE BOXES:

**to purchase the supplies, click HERE**

Garden Green (#102584) Blushing Bride (#119796) Real Red (#102482) Baja Breeze (#111352) Brushed Gold (#102935) Brushed Silver (#100712) 8-1/2″ x 11″ cardstock

Candy Cane Christmas Specialty Designer Series Paper

Sizzix Big Shot Die-Cutting Machine (Item #113439)

Sizzix Matchbox Die (Item# 114890) RECOMMENDED (or click HERE for the template)

Paper cutter with scoring blade

Double-sided adhesive

Ribbon

Beads

1-3/4″ , 1″, and 1/2″ circle punches

Curly label extra-large punch (#119851)

Snowflake extra-large punch (#119852)


You’ll get all of these pieces with the matchbox die.  The best part is that the die not only cuts the pieces, it also scores and perforates for you.  You can see why (on a project like this where you need so many matchboxes) that the die is worth its weight in gold!

Make the box:

Punch out and make assorted embellishments to decorate the boxes.  Don’t forget to make the numbers, too.


I’ll see you tomorrow for Part III.