Make a Scroll Card

      Comments Off on Make a Scroll Card

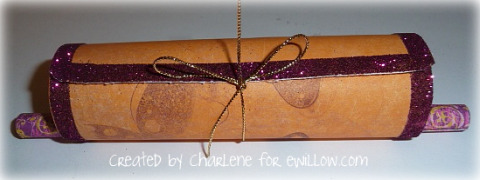
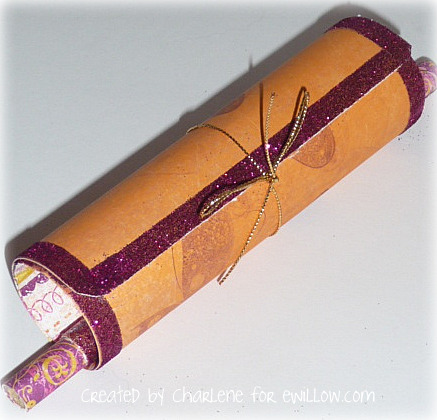
Today’s project is a scroll card.

Supply List/Instructions:

1)  Pencil, cut down to six inches (I think “novelty” pencils work best…you know, the ones that kids get inside their goody bags at school?  They are thicker than regular pencils.)  Cut off the eraser-end.

2)  Cover the pencil with Designer Series Paper.  Use Sticky Strip (a heavy-duty double-sided tape) to adhere paper to pencil.

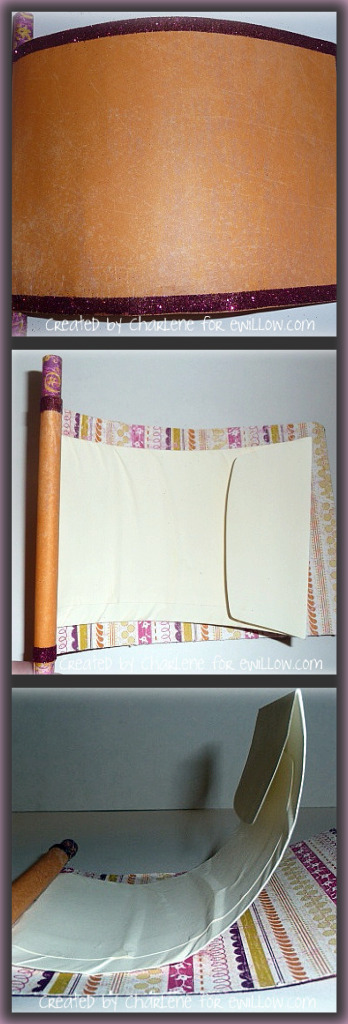
3)  Cut a piece of Designer Series Paper 4 1/2″ x 2″ longer than the envelope you use.

4)  Tape one edge of the the envelope to one edge of the Designer Series Paper

5)  Once you complete Step #4, attach that piece to the pencil using Sticky Strip

6)  Loosely roll the Designer Series Paper and tie with ribbon

I Love Lucy Hand Puppet

      Comments Off on I Love Lucy Hand Puppet

Who doesn’t love Lucy, right?  I remember spending my summer days watching re-run after re-run of “The Lucy Show” when I was little.  I was so excited when my neighbor asked me to help her with her school project.  She did a biography on a famous person, and guess whom she chose?  Yes, Lucille Ball.

If you would like the template for the puppet, click here:  puppetfacepattern.pdf  (I am not taking credit for this pattern.  I found it here, but it wasn’t full-size, so I had to draw it free-hand.  If the original pattern is yours, let me know and I will credit it as your work ;))

I made paper hair, but you can use yarn or put a little hat on it, or whatever floats your boat.  You can also use the pattern to make any face you want.  (My girls think that “Puppet Lucy” looks kind of creepy.)

Here are the steps:

1)  Use the pattern to create the head

2)  Using a paper towel roll for the body, attach the head with strong tape

3)  Dress the paper towel roll to correspond with whatever puppet face you are making.

Below are some Vogue shots of Miss Lucy.

Here is her lovely body-shot:

Her fabulous mid-shot:

And last but not least, her stunning head-shot:

A Night at Donald Trump’s House

Post Updated 10/11/2016

Edited to add that this post is in NO WAY an endorsement of Donald Trump. 

My uncle was kind enough to invite us again this year to the Palm Beach Police Foundation’s annual Policeman’s Ball. (He’s the Pres.) The event was held at Mar-a-Lago, which just happens to be where Donald Trump lives. You might remember when we went two years ago and THIS happened.

We had a fun time, even though the weather did not cooperate.

Here are some tidbits from the evening:1) Isn’t this a cute way to serve dessert? Just a bunch of different cookies and some candy. There were a couple of these dishes placed on each table alongside the regular dessert which was some type of chocolate cheesecake. 2) The Donald is TALL. I had very high heels on and he still towered over me. Well over 6 feet.

3) The fam with our cop sunglasses on. (Baby Gianni is getting ready to make his debut any day/week now.)

4) Most exciting part of the night: For the very first time ever, I turned the camera and took a picture of myself. (I have always wanted to do that, but never found the right opportunity.)


5) My uncle (right) presenting an award to The Donald

6) I took a picture of Mr. Trump dancing with my aunt, but his security team swarmed on me like ants on sugar and stood there with their arms crossed and made me delete it. Hmmm. I think they need to work for the TSA. What did they think I was going to do with it? Put it on my blog or something?

Ice on My Car

      Comments Off on Ice on My Car

This might not seem very newsworthy to most of you around the USA, but down here in sunny south Florida, this is RARE.

I had to wake up bright and early on this freezing cold morning to attend a church meeting for my new calling with the Young Women.
I had to remind myself that I wasn’t in NJ when I looked at my windshield and beheld this lovely site:

Yes, that is ICE on my windshield! And even though those look like raindrops, they are pieces of ice on the hood of my car.
No kidding.

Valentine’s Day Bouquet

      Comments Off on Valentine’s Day Bouquet

Here is a fun treat.  I used red-hots for one flower and red fruit snacks for the other.  The red/white candies in the tin are Dots that I had left over from Christmas.  (Gross, I know, but I wanted to finish this project before we left for NJ and I was out of time.)  I suggest filling the tin with lots and lots of these flowers-on-a-stick!  I gave up after only making two because not only did I run out of time, but because I also ran out of red candy.  Just imagine how festive this gift would look if it were overflowing with flowers of different heights and colors! 

First, I stamped two hearts from the Sweet Centers stamp set.  Next, I cut out the hearts and punched out the centers.  Then I filled the candy cups and used the large scallop circle from the Scallop Circle #2 Die as the backing of the candy cup and the actual flower.

I used the punched-out circles to cover where I attached the sticks on the back of the flowers: